

Figuring out how to build a skincare routine can feel overwhelming when you're staring at dozens of products and conflicting advice. Cleanser before toner or after? Do you really need a serum? What about your specific skin type, does it actually change which products you should use and in what order? These are real questions, and they deserve straightforward answers.
Here's the thing: a good skincare routine doesn't need to be complicated. It needs to be intentional. The right products, applied in the correct order and matched to your skin type, make all the difference between wasting money on a shelf full of half-used bottles and seeing actual results in the mirror. I've been there, spending on products that promised everything and delivered nothing for my skin. That trial-and-error process is exactly why we built Beautifully Within: to help people cut through the noise and find what genuinely works for their skin and overall well-being.
This guide walks you through every step of building a skincare routine from scratch. You'll learn the essential products you need (and which ones you can skip), the right application order for morning and night, and how to adjust everything based on whether your skin runs oily, dry, combination, or sensitive. No guesswork, no fluff, just a clear path to healthier skin that you can start following today.
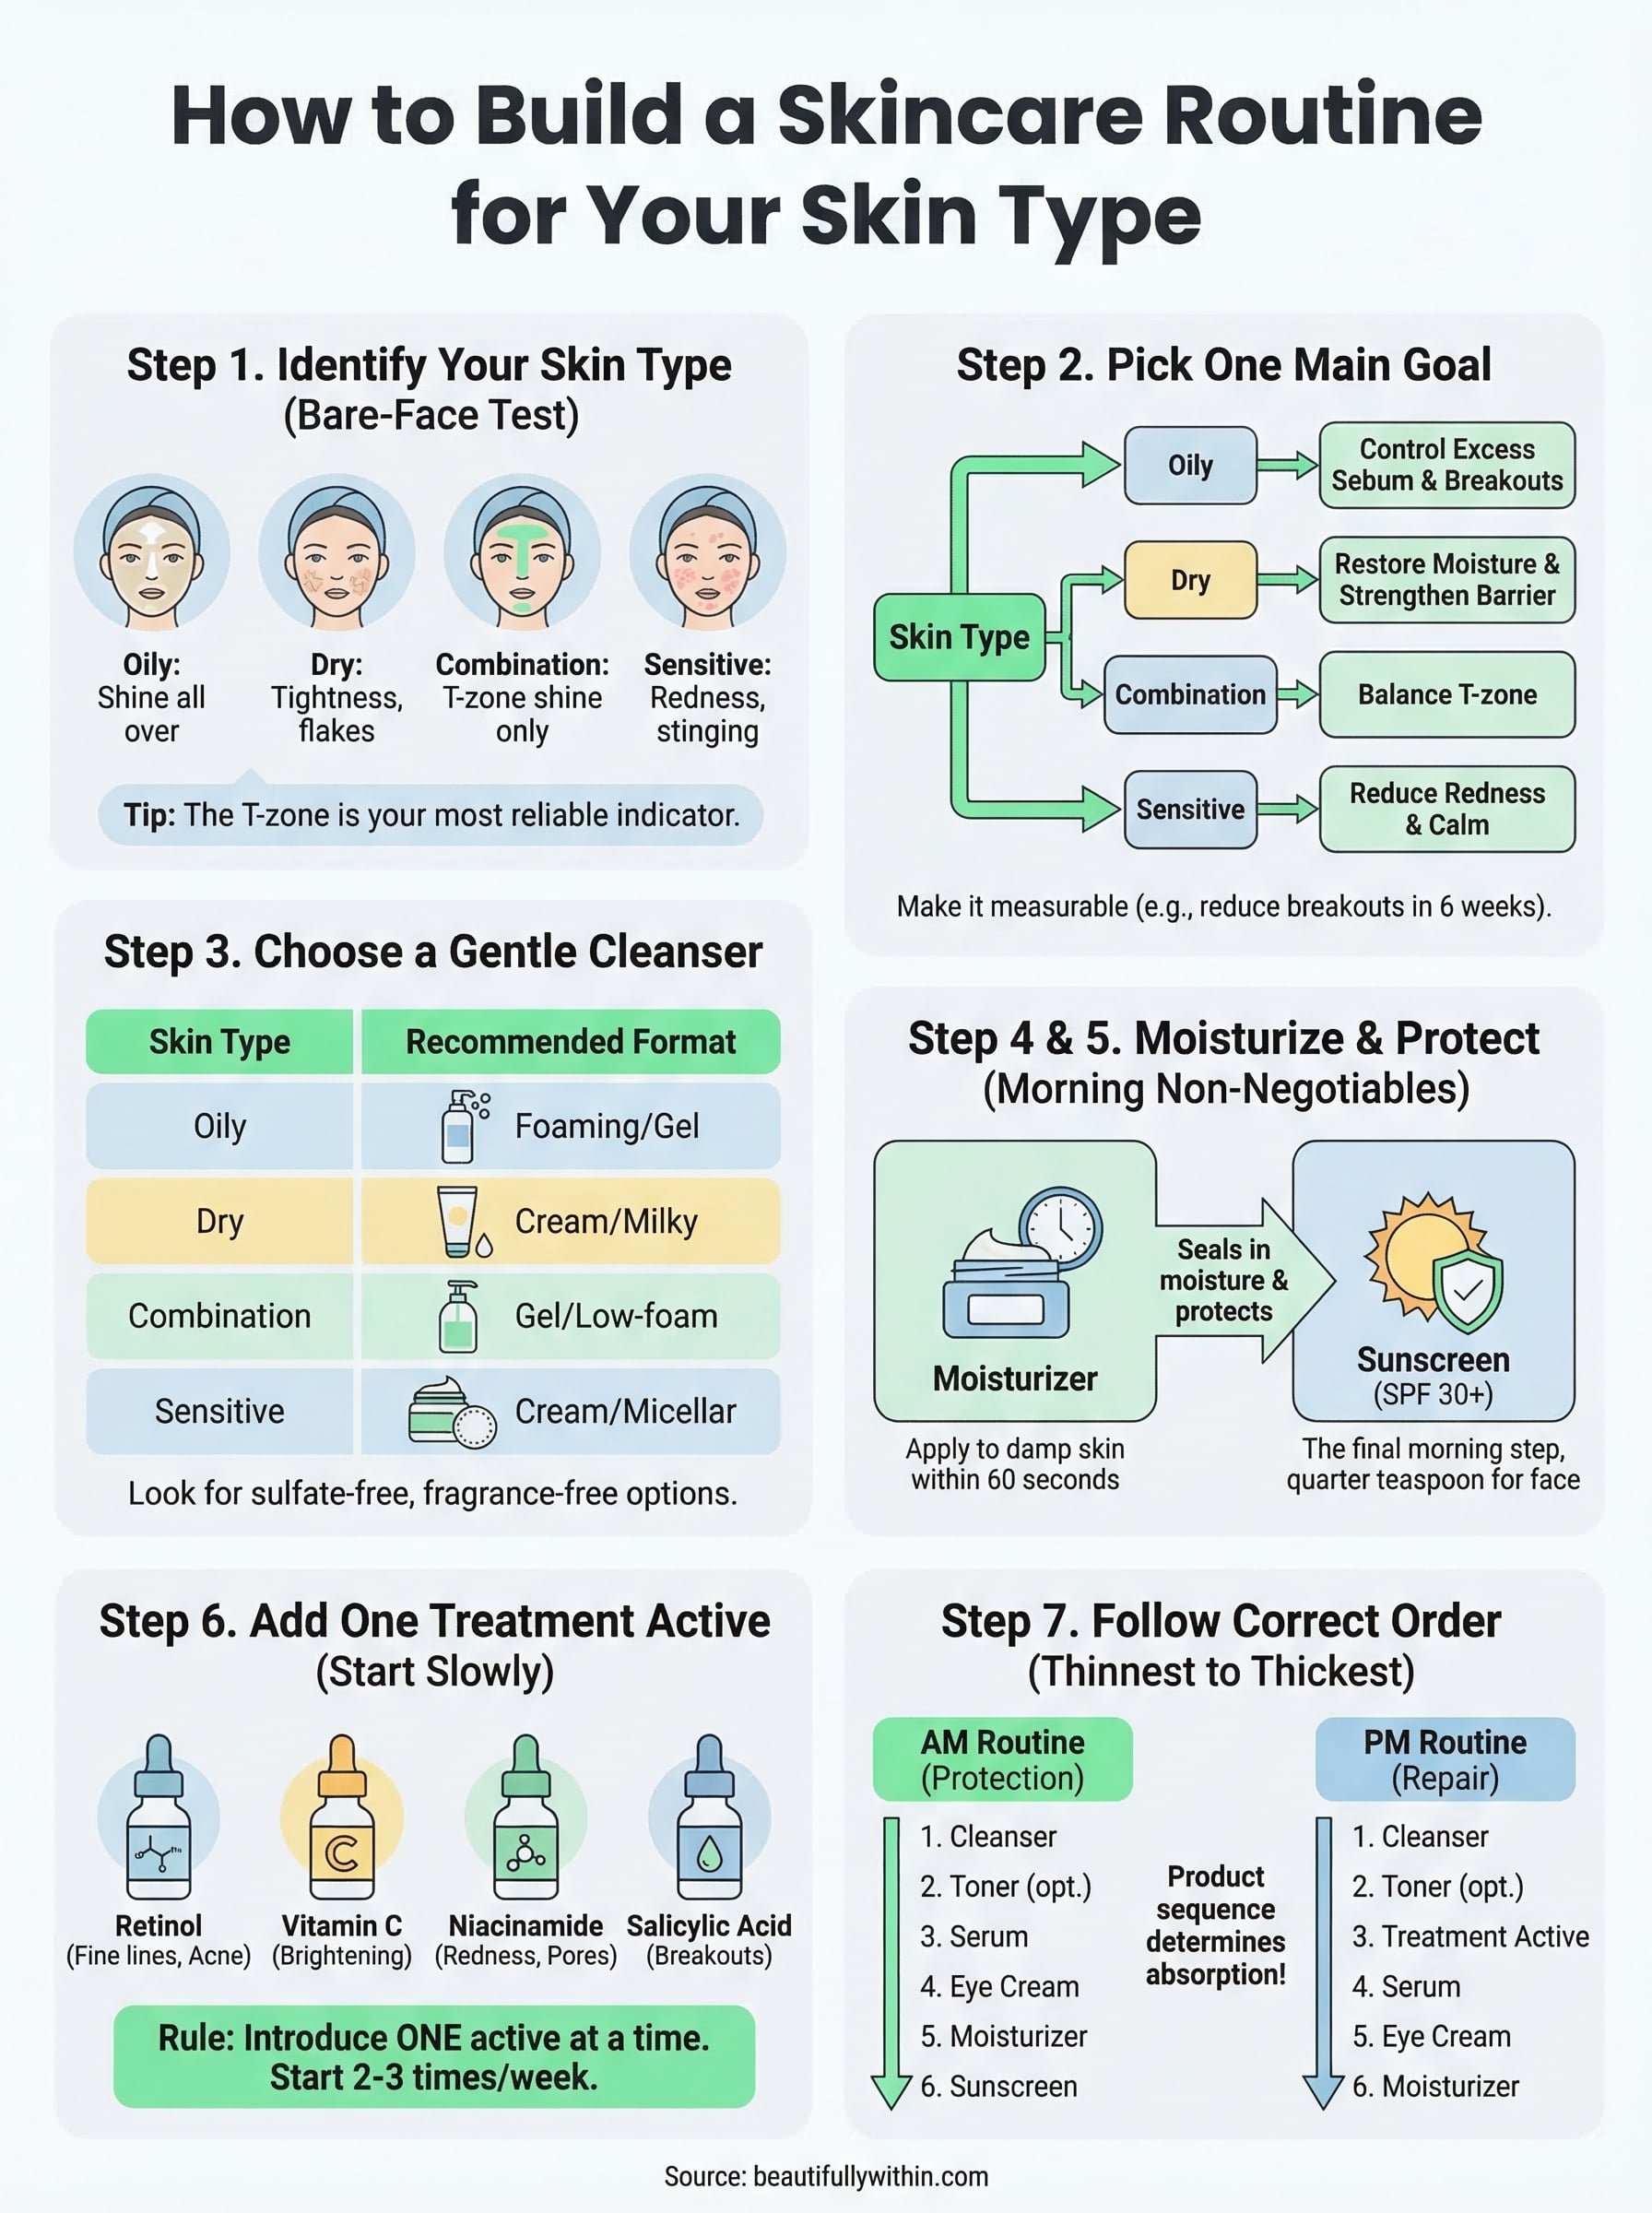
Step 1. Identify your skin type in 20 minutes
Before you pick a single product, you need to know what type of skin you're working with. Skipping this step is the most common reason people end up with shelves full of products that either do nothing or actively irritate their skin. Understanding your skin type is the foundation of learning how to build a skincare routine that delivers real results instead of frustration.
The bare-face test
The bare-face test is the most reliable method you can do at home without any special tools. All you need is a gentle face wash, a clean towel, and about 20 to 30 minutes of your time. Follow these steps exactly:

- Wash your face with a mild, fragrance-free cleanser.
- Pat your skin dry with a clean towel.
- Apply nothing afterward, no toner, no moisturizer, no serum, nothing.
- Wait 20 to 30 minutes. Sit somewhere comfortable and resist touching your face.
- Stand in front of a mirror in natural light and observe.
After the wait, check three specific zones: your forehead, your T-zone (nose and chin), and both cheeks. What you see and feel in each area points directly to your skin type.
The T-zone is the single most reliable indicator of your skin type. Shine concentrated there with dry or comfortable cheeks almost always signals combination skin.
What your results mean
The way your skin looks and feels after 20 to 30 minutes without any products maps to one of five categories. Use this table to match what you observed:
| What you observe after the test | Skin type |
|---|---|
| Shine across your entire face | Oily |
| Tightness, flaking, or rough patches anywhere | Dry |
| Shine only on your T-zone, normal or dry cheeks | Combination |
| Redness, stinging, itching, or visible irritation | Sensitive |
| Comfortable, balanced, no shine, no tightness | Normal |
Normal skin is actually far less common than people assume. If your skin feels completely balanced and comfortable with no shine or tightness, that's a great starting point. Most people fall into oily, dry, or combination, with sensitivity layered on top.
When your skin type is hard to pin down
Some people test as both oily and sensitive, or dry with frequent breakouts that look like an oily skin problem. These combinations are real and common. Your skin type can also shift with the seasons, stress levels, hormonal changes, or even a change in climate.
If sensitivity is part of your picture, treat it as your top priority regardless of anything else you observe. Build around calming and barrier repair first, then address oiliness or dryness once your skin stops reacting. When two types feel equally possible, default to products formulated for sensitive skin since those options are gentle enough to work across most skin types without triggering new problems.
A quick check-in with your current products
Before moving forward, take two minutes to look at what you're already using and notice whether your skin reacts positively, negatively, or not at all. Products that consistently cause redness, peeling, or breakouts are clues about your skin type that the bare-face test alone might not catch. Write down what you're using and how your skin responds, even in a quick note on your phone. That information will make every step after this one faster and more accurate when you start selecting new products for your routine.
Step 2. Pick one main skin goal and keep it simple
One of the biggest mistakes people make when figuring out how to build a skincare routine is trying to fix everything at once. They pile on products targeting acne, dark spots, fine lines, and dryness simultaneously, and then wonder why their skin breaks out or feels irritated. Picking one primary goal keeps your routine manageable and gives you a clear way to measure whether it's actually working.
Why one goal works better than five
When you introduce multiple active ingredients at the same time, your skin has no baseline. If something causes a reaction, you have no idea which product triggered it. You also risk layering ingredients that work against each other or overload your skin barrier with more than it can handle at once. Starting with one goal means every product in your routine serves a clear, connected purpose, and you can evaluate results without second-guessing what is or isn't contributing.
The simplest routine you'll actually stick with every morning and night will always outperform a complicated one you abandon after two weeks.
How to match your goal to your skin type
Your skin type from Step 1 should directly influence which goal you prioritize first. Not every goal makes sense for every skin type, and choosing the wrong one can make your skin concerns worse rather than better. Use this table to match your skin type to the most practical starting point:
| Skin type | Recommended first goal |
|---|---|
| Oily | Control excess sebum and minimize breakouts |
| Dry | Restore moisture and strengthen your skin barrier |
| Combination | Balance your T-zone without drying out your cheeks |
| Sensitive | Reduce redness and calm reactivity |
| Normal | Maintain your current balance and add sun protection |
How to set a goal you can actually measure
Vague goals like "better skin" make it impossible to know whether your routine is working. A measurable goal sounds like: "Reduce visible breakouts on my chin within six weeks" or "Keep my cheeks from feeling tight by mid-afternoon." Write your goal down somewhere you'll see it regularly and set a reminder to check in at the four-week mark. Most visible skin changes take at least 28 days to appear because that's roughly how long your skin cell turnover cycle runs. Give your routine enough time before you swap or add anything new.
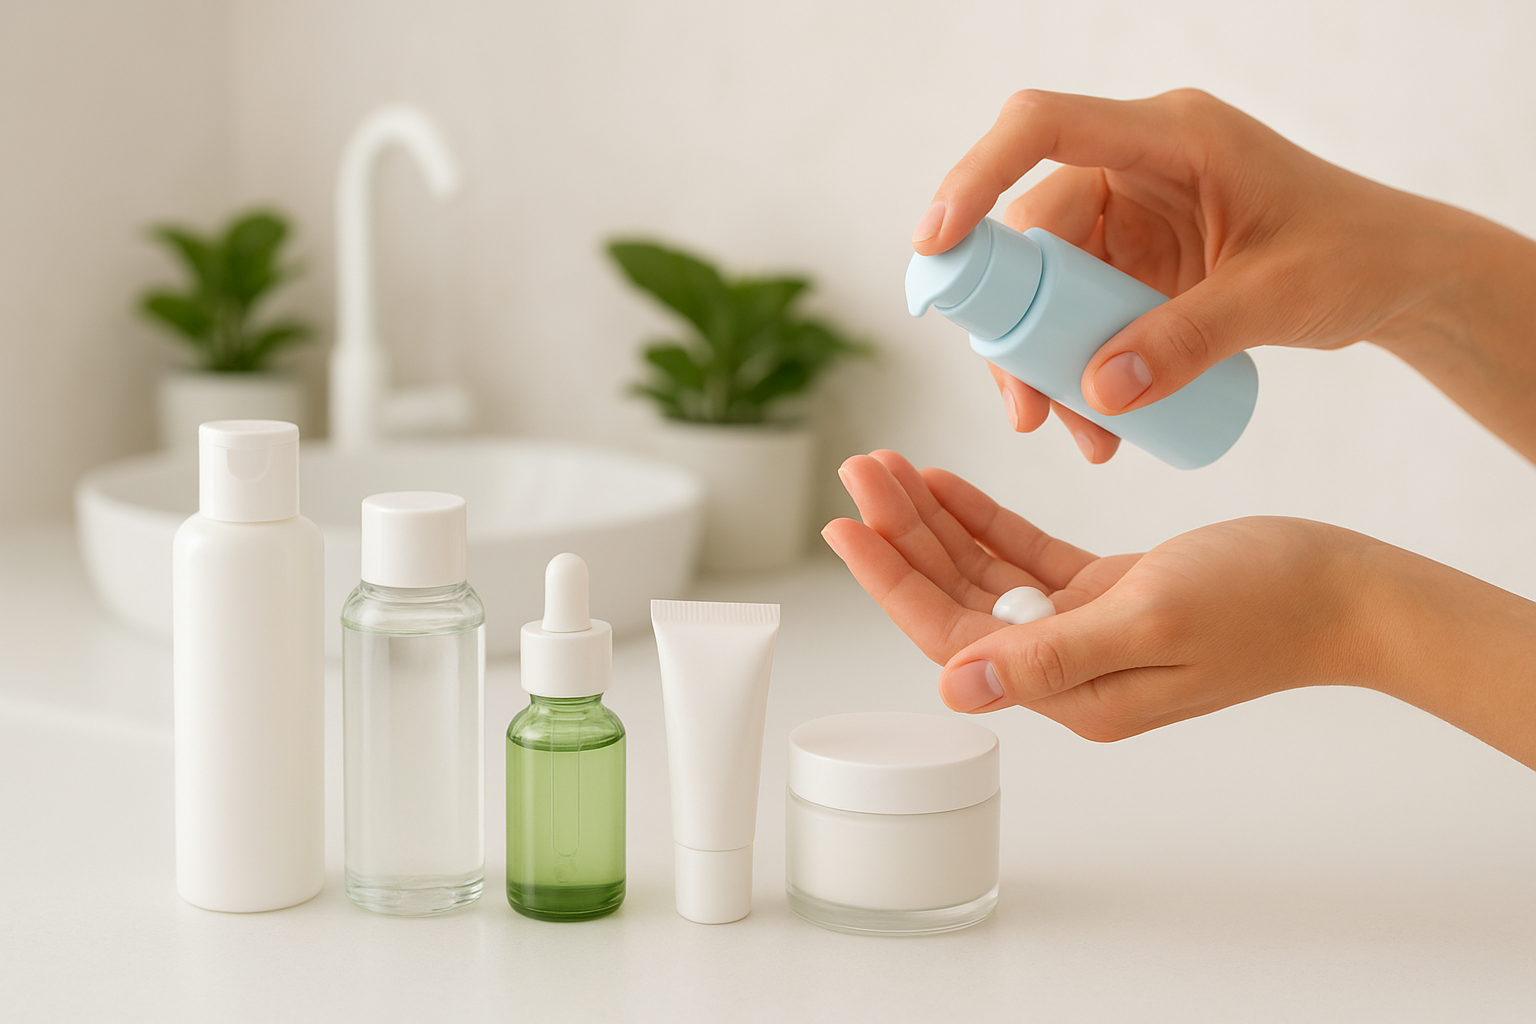
Step 3. Choose a gentle cleanser for your skin type
Cleansing is the foundation of every skincare step that follows it. If you're learning how to build a skincare routine, a cleanser that strips or irritates your skin sets everything else up to fail. Your moisturizer, serum, and sunscreen will all perform better when your skin starts from a clean, balanced, undisturbed baseline rather than one dried out or inflamed by a harsh wash.
What makes a cleanser "gentle"
A gentle cleanser removes dirt, excess oil, and leftover sunscreen without stripping your skin's natural moisture barrier. Watch for these common offenders on ingredient labels: sodium lauryl sulfate (SLS), ethanol or denatured alcohol, and added fragrance, especially if your skin leans sensitive or dry. Sulfate-free formulas that rinse clean without leaving a tight, squeaky feeling on your face are almost always the safer starting point for any skin type.
If your face feels tight immediately after washing, your cleanser is too harsh, regardless of your skin type.
Match your cleanser format to your skin type
The format of your cleanser matters as much as the ingredients inside it. Foaming cleansers work well for oily skin because they break down sebum more effectively, but they're usually too drying for dry or sensitive skin. Gel and cream formulas are gentler and tend to preserve more moisture during the cleanse. Use this table to find your best starting option:
| Skin type | Recommended format | What to look for |
|---|---|---|
| Oily | Foaming or gel | Salicylic acid, niacinamide, fragrance-free |
| Dry | Cream or milky lotion | Ceramides, glycerin, no sulfates |
| Combination | Gel or low-foam | Balanced pH, lightweight, fragrance-free |
| Sensitive | Cream or micellar water | Minimal ingredients, no fragrance, no alcohol |
| Normal | Gel or cream | Fragrance-free, balanced, simple formula |
How often to cleanse
Most skin types do best with twice-daily cleansing: once in the morning to clear overnight buildup and once at night to remove sunscreen, makeup, and everything the day left behind. If your skin is very dry or sensitive, a plain water rinse in the morning followed by a full cleanse at night is a completely valid approach that many dermatologists support.
Follow this simple cleansing frequency framework:
- Morning: Water rinse only (dry or sensitive skin) or full cleanse (oily, combination, normal)
- Evening: Always cleanse fully to remove sunscreen and daily buildup
- After heavy exercise: Rinse or cleanse right away if you're prone to breakouts
Step 4. Add a moisturizer that supports your barrier
A moisturizer does more than add hydration. It seals in the work your cleanser just did and keeps your skin barrier functioning the way it should. When you know how to build a skincare routine that actually holds up over time, moisturizing consistently is one of the non-negotiable steps, regardless of whether your skin runs oily, dry, or somewhere in between.
Why your skin barrier needs daily support
Your skin barrier is the outermost layer of your skin, and its job is to keep moisture in and irritants out. Skipping moisturizer, especially after cleansing, forces your skin to compensate by producing more oil or triggering redness and flaking. Over time, a compromised barrier makes every other product in your routine less effective because your skin is too busy reacting instead of absorbing.
A well-moisturized barrier absorbs active ingredients more evenly, which means your serums and treatments actually reach the cells they're meant to target.
Match your moisturizer texture to your skin type
The weight and texture of a moisturizer determines how it sits on your skin and whether it supports or overwhelms your barrier. A rich cream on oily skin can clog pores. A lightweight gel on dry skin won't provide enough protection overnight. Use this table to find the right match:
| Skin type | Best texture | Key ingredients to look for |
|---|---|---|
| Oily | Lightweight gel or fluid | Niacinamide, hyaluronic acid, no mineral oil |
| Dry | Rich cream or balm | Ceramides, shea butter, squalane |
| Combination | Lotion or gel-cream | Glycerin, ceramides, lightweight oils |
| Sensitive | Fragrance-free cream | Centella asiatica, ceramides, oat extract |
| Normal | Lotion or light cream | Hyaluronic acid, glycerin, simple formula |
How to apply moisturizer correctly
Timing matters more than most people realize. Apply your moisturizer within 60 seconds of cleansing while your skin is still slightly damp. This approach locks in residual moisture instead of letting it evaporate into the air. Use upward, gentle strokes across your face and neck, and never tug or rub the skin around your eyes. Two to three pumps or a pea-sized amount is enough for most people. More product doesn't mean better results.
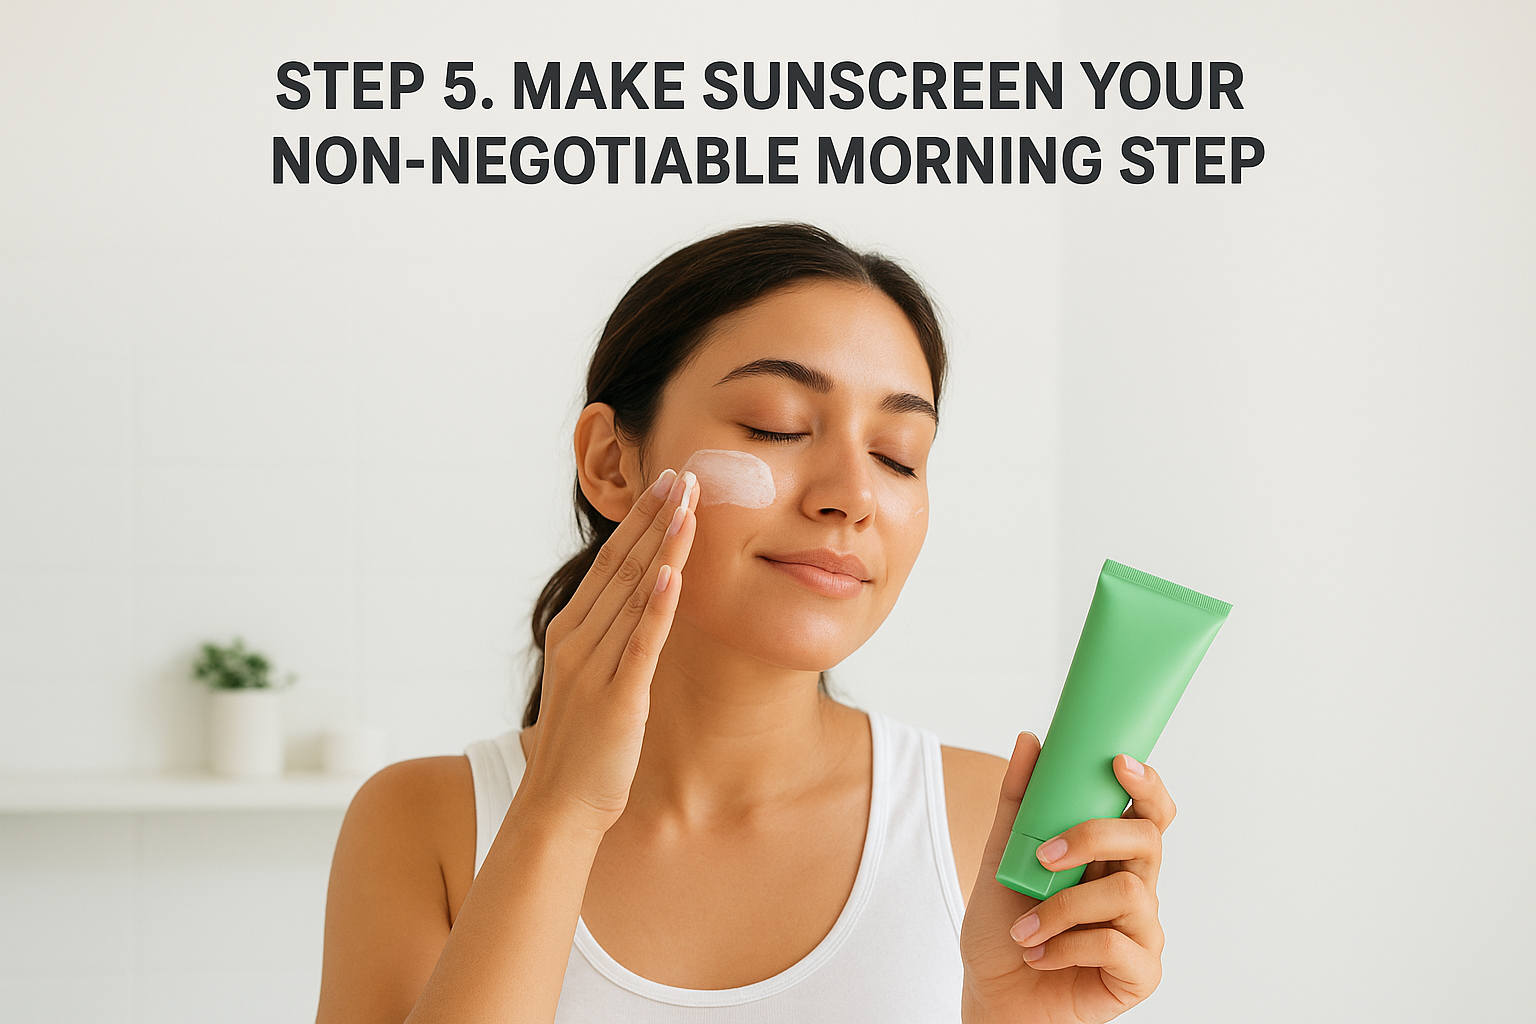
Step 5. Make sunscreen your non-negotiable morning step
Sunscreen is the single most impactful product in any morning routine. When you understand how to build a skincare routine that actually prevents damage instead of just treating it after the fact, sunscreen belongs at the end of every AM routine without exception. UV exposure is the leading cause of premature aging, hyperpigmentation, and barrier breakdown, and that happens whether the sun feels strong or not.
Why sunscreen belongs in every morning routine
UV rays reach your skin on cloudy days, through car windows, and even through glass at your desk. Skipping sunscreen because you're mostly indoors is one of the most common mistakes people make, and it undoes the protective work of every other product you applied before it. Your moisturizer and serum can only do so much when daily UV exposure keeps damaging the same cells those products are working to support.
Sunscreen is the only skincare product with direct clinical evidence that it slows visible skin aging when used consistently every day.
How to choose the right SPF for your skin type
SPF 30 is the minimum that dermatologists recommend for daily use, and SPF 50 gives you meaningful extra protection without requiring a dramatic change in how you apply it. The bigger decision is choosing between mineral and chemical formulas based on your skin type. Use this table to find the right starting point:
| Skin type | Recommended formula | What to look for |
|---|---|---|
| Oily | Chemical or gel-based | Lightweight, matte finish, no white cast |
| Dry | Chemical or hybrid | Moisturizing base, no alcohol |
| Combination | Fluid or gel | Balanced finish, SPF 30-50 |
| Sensitive | Mineral (zinc oxide) | Fragrance-free, no chemical filters |
| Normal | Chemical or mineral | SPF 30-50, comfortable finish |
How to apply sunscreen correctly
Amount and coverage matter more than most people realize. Use a quarter teaspoon, roughly two finger-lengths of product, for your face alone, and apply it as the last step in your morning routine after moisturizer and before makeup. Blend it into your neck and ears too, areas most people skip and then notice uneven aging on years later.
Follow this simple morning application checklist every day:
- Apply after moisturizer, before makeup
- Use a quarter teaspoon for your face plus a little extra for your neck
- Blend into your ears and along your hairline
- Wait 60 seconds before applying makeup on top
- Reapply every two hours if you're spending extended time outdoors
Step 6. Add one treatment active at a time
Treatment actives are the targeted ingredients that address specific skin concerns like acne, dark spots, or fine lines. When you figure out how to build a skincare routine that goes beyond the basics, actives are where you get the most visible results, but only if you introduce them one at a time and in the right sequence. Adding two or three new actives in the same week makes it nearly impossible to tell what is helping, what is hurting, and what is doing nothing at all.
Introducing one active at a time is the single fastest way to build a routine that works, because you always know exactly what to credit or blame.
The most common treatment actives explained
Each active targets a specific skin concern, and knowing what each one does helps you match it to the goal you set back in Step 2. Use this table as a quick reference before you pick your first treatment:
| Active ingredient | Best for | Skin types to use with caution |
|---|---|---|
| Retinol | Fine lines, uneven texture, acne | Sensitive, dry (start low) |
| Niacinamide | Redness, enlarged pores, dark spots | Works for most types |
| Salicylic acid | Blackheads, active breakouts | Very dry or sensitive |
| Vitamin C | Brightening, dark spots, antioxidant protection | Sensitive (use low concentrations) |
| Glycolic acid | Exfoliation, uneven tone | Dry, sensitive (use sparingly) |
| Azelaic acid | Redness, mild acne, hyperpigmentation | Gentle enough for most types |
How to introduce a new active safely
Start with the lowest concentration available and use it two or three times per week instead of daily. Your skin needs time to build tolerance, especially with retinol or exfoliating acids. After two weeks of no visible irritation, you can increase frequency gradually toward daily use if the product and your skin type support it.
Follow this four-step process for every new active you add to your routine:
- Week 1 to 2: Apply two to three nights per week, always after cleansing and before moisturizer.
- Week 3 to 4: Check for redness, peeling, or breakouts. If skin is stable, increase to every other night.
- Week 5 and beyond: Move toward daily use only if your skin has shown zero irritation.
- At the 8-week mark: Assess whether you're seeing progress on your goal before adding any second active.
Wait at least eight weeks before layering in a second active ingredient. Your skin needs that window to adapt and for you to accurately judge whether the first treatment is delivering results worth keeping.
Step 7. Follow the right order for AM and PM
Product order is not just a preference, it is the difference between your skincare working and sitting on top of your skin doing very little. When you think about how to build a skincare routine that actually delivers results, applying products from thinnest to thickest consistency is the rule that holds everything together. Heavier products physically block lighter ones from reaching your skin, so sequence determines absorption.
Getting the order right costs you nothing extra and makes every product you already own perform better.
Your morning routine order
Your morning routine focuses on protection more than treatment. You're preparing your skin to face UV exposure, environmental pollutants, and whatever the day brings. Keep it lean and purposeful, because fewer steps applied correctly outperform a long lineup applied in the wrong sequence.
Follow this order every morning:
- Cleanser (or water rinse for dry and sensitive skin types)
- Toner (optional, if you use one for pH balance or hydration)
- Serum (vitamin C or niacinamide work well in the morning)
- Eye cream (if you use one, tap it in before heavier products)
- Moisturizer
- Sunscreen (always last, always a quarter teaspoon minimum)
Your evening routine order
Your PM routine shifts focus toward repair and treatment because your skin regenerates overnight and active ingredients work without UV interference. This is the right window for retinol, acids, and any richer barrier-support products.
Follow this order every evening:
- Cleanser (always do a full cleanse at night)
- Toner (optional)
- Treatment active (retinol, salicylic acid, azelaic acid, or whatever you chose in Step 6)
- Serum (hyaluronic acid or a repair serum works well here)
- Eye cream (if you use one)
- Moisturizer (choose a richer texture at night if your skin is dry or compromised)
One rule to keep both routines on track
Spot the texture of each product before you apply it. Lighter, water-based products always go before heavier, oil-based ones. If you ever add a new product and feel unsure where it fits, check the consistency in your palm first. Runny and watery goes near the beginning. Thick and creamy goes near the end. That one habit keeps your routine working no matter how your lineup evolves.
Step 8. Troubleshoot irritation, breakouts, and pilling
Even when you follow every step correctly, skin reactions happen. Knowing how to build a skincare routine also means knowing what to do when something goes wrong. The three most common problems people run into are redness and irritation, new breakouts, and pilling (that balling-up texture when products don't layer cleanly). Each one has a specific fix, and none of them mean you need to scrap your whole routine and start over.
When your skin reacts with redness or breakouts
Redness and new breakouts usually point to one of two causes: either a product ingredient doesn't agree with your skin, or you introduced too many changes at once. The clearest fix is to strip your routine back to the basics, meaning cleanser, moisturizer, and sunscreen only, for one full week. Once your skin calms down, reintroduce products one at a time with at least five days between each addition.
If your skin breaks out every time you add a specific product, check that product's ingredient list against known pore-clogging ingredients before trying it again.
Watch for these specific triggers before you reintroduce anything:
- Fragrance in any product (a top irritant across most skin types)
- High concentrations of alcohol in toners or serums
- Two exfoliating acids used within the same routine
- Retinol applied more than twice a week during the first month
When products ball up and pill on your skin
Pilling happens when incompatible textures stack on top of each other before they absorb. The most common cause is applying a silicone-heavy sunscreen directly over a water-based serum that hasn't fully absorbed yet. Your skin can only take in so much product at once, and the excess sits on the surface and rolls off when you touch it or apply the next layer.
Fix pilling with these two adjustments:
- Wait 60 seconds between each layer, especially between serum and moisturizer.
- Use less product overall. One pump of serum and a pea-sized amount of moisturizer is enough for most faces.
If pilling continues even after you slow down your application, check whether two products in your routine share a silicone-heavy base. Swapping one for a gel or water-based alternative almost always resolves the problem without requiring you to replace your entire lineup.
Your simple routine, summarized
Building a skincare routine doesn't require a pharmacy's worth of products or a complicated schedule. Start with the basics: a gentle cleanser matched to your skin type, a moisturizer that supports your barrier, and a reliable SPF 30 or higher sunscreen every morning. These three steps alone will do more for your skin over time than a 10-step lineup applied without intention or understanding.
Once those basics feel consistent, layer in one treatment active targeted at the skin goal you identified in Step 2, follow the correct AM and PM order, and troubleshoot any reactions by stripping back to basics first. That's exactly how to build a skincare routine that holds up long-term without creating more problems than it solves.
Ready to put what you've learned into action? Browse the premium skincare collection at Beautifully Within for everything from gentle cleansers to targeted serums, matched to your skin's actual needs.